|
Home - RV-9A: Right Wing Prep
|
|
|
 12/1/2006 - Started on the Right Wing!
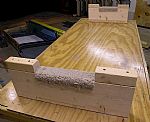
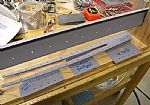
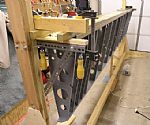
Now that I have gone through the building process with the left wing, I going to approach several things differently with the right. I decided to build these table jigs to hold the main wing spar upsi ... read more
|
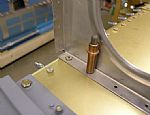
 12/2/2006 - Riveted on the access panel platenuts
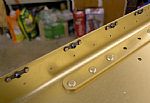
There are 3 sets of these platenuts on the main spar. I countersunk the spar for the flat head rivets that hold the platenuts on, making sure to spot prime each countersink before riveting.
... read more
|
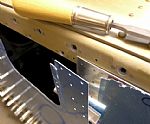
 12/5/2006 - Countersunk the main spar for the K1000-4 plate-nuts
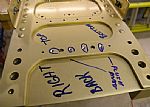
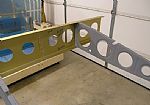
The K1000-4 center section attach plate-nuts go on the forward side of the spar. There is vertical bar (F-904G) that has to rest flat against the aft side of the main spar, so the rivets have to flat. ... read more
|
 12/6/2006 - Started work on the right wing rear spar
I located all of the parts. Now it�s time to think in reverse, since the plans show the left wing assembly.
... read more
|
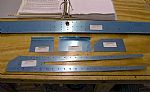
 12/7/2006 - Primed the right wing rear spar parts
After smoothing the edges of each part which the Scotchbrite wheel and some 400 grit sandpaper, I grabbed the old rattle can primer and put on a thin coat.
... read more
|
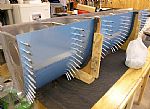
 12/10/2006 - Wing cradle modification
Since I am only using "my half" of the garage, there are space limitations. Up until now I have kept all of the unused wing parts in the original 3x6 crate that I got from Van's when the wings were de ... read more
|
 12/12/2006 - Getting ready for the riveting session
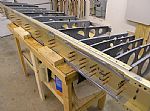
I put duct tape on the W-906B/D spar flange bars on the main spar to prevent any damage from using the bucking bar while riveting the ribs in place. I also screwed 2 2x4�s to the top of the work bench ... read more
|
 12/13/2006 - Time to start riveting the ribs to the main spar
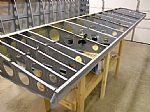
I numbered the ribs, 1 thru 15, with the #1 rib being the first one at the inboard end of the main spar. I removed the end outboard rib (#15) since it doesn�t get riveted on yet. To get enough room to ... read more
|
 12/14/2006 - Riveted on the right wing rear spar
I used a combination of the hand squeezer and the pneumatic squeezer to rivet on the spar. The instructions are a little vague about what rivets to not put in. There are groupings of rivetings shown o ... read more
|
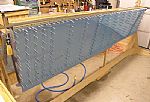
 12/15/2006 - Put the right wing spar/rib assembly on the wing jig
Before I put the spar/rib assembly on, I made sure that the jig arms were level. I put shims under it where it needed leveling. Then I got my caulk gun and shot some Liquid Nails under the base to glu ... read more
|
 12/19/2006 - Drilled initial locater holes in wing walk doubler sheet
Drilled initial locater holes in wing walk doubler sheet
On each inboard end of each wing there are five ribs that are placed close together to provide strength for the pilot and passenger to walk on ... read more
|
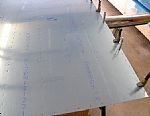
 12/20/2006 - Finished final drilling the top skins
First, I put in clecos in every other hole on both sheets and then drilled every un-clocoed hole, marking each drilled hole with a sharpie. Then I moved all the clecos over one hole and drilled the re ... read more
|
 12/21/2006 - Final drilled the bottom skins
Not many pictures here, just a lot of cleco moving and drillin' goin' on. When this aircraft is finished, I'm going to have the firmest hand shake in the world.
... read more
|
 12/23/2006 - Beveled the wing skins
In order for the tank skin to transition smoothly over where the wing skins overlap each other, both skins need to be beveled at the point where the tank meets the skins. I used my special soft metal ... read more
|
 12/24/2006 - Started work on right wing leading edge assembly
The first entree on todays menu is to make holes in the back flange of the 5th rib in the leading edge assembly to accommodate 2 exiting rivets on the main spar. I placed the rib directly over the mai ... read more
|
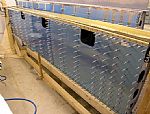
 12/27/2006 - Finished clecoing the lead edge assembly together
I waited for my order of new clecos to come in so I could finish putting this dude together. After completing this part I read the next instruction in the manual which said to remove the bottom skins, ... read more
|
 12/31/2006 - Final drilled the right wing leading assembly
I just realized that it's "tank time". Wow, this right wing is really moving along in comparison to the left. It's time to order some Proseal fuel tank sealant.
... read more
|


