RV-9A: Left Wing Prep - 4/12/2006
Home Previous Entry Next Entry Back |
Share on:

|
|
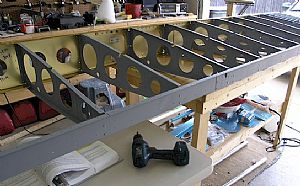
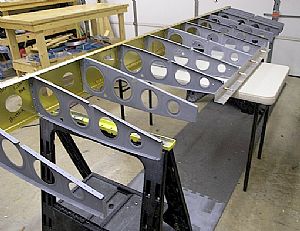 Time to starting riveting the spars and ribs together Time to starting riveting the spars and ribs together
After doin' some head scratching I decided that the front spar needed to be riveted first, since it would probably be the most difficult. I pulled the whole rig off the work table and put it on a smaller table with a saw horse on each end. Then I put an 8 ft 1x4 board under the ribs and across the small table to hold the ribs up. Then I removed the rear spar, replacing it with a 4 foot piece of aluminum angle with #30 holes drilled in it to cleco back on to four of the center ribs. I pull out the 1x4 allowed the weight of the rig to be supported by 4 of the ribs which were attached to the aluminum angle. Now I would be able to walk in between the outer ribs to get better access to the riveting of the front spar. UPDATE 12/14/2006: I did the right wing a little different during this stage. I think it's a little easier. Check it out.
|
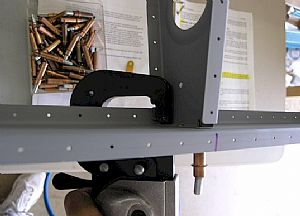
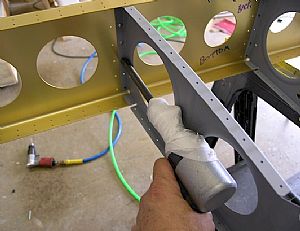 Started riveting the ribs to the front spar Started riveting the ribs to the front spar
I knew that the standard rivet shank was not going to cut it for this portion of the riveting project. I used a 7.5 inch Rivet Shank that I got from Averys to put the rivet gun far back enough to where I wouldn't have to push the rib too far out the way to get the rivet in. I also put cloth medical tape around the rivet gun to prevent scratching off the primer on the rib. I also had to bump up the air pressure to 47 lbs to make the riveting session as short as possible (and not beat the crap out of my bucking bar hand).
|
 So far, so good So far, so good
This wasn't as bad as I thought it would be. I only had to drilled out one rivet, which happened to be the first one I put in, along with the revelation of "Ohhhhhhh, that's how you're supposed to do it!".
|
 Well, so much for being not so hard to do Well, so much for being not so hard to do
I had to transition to somewhat of a "blind bucker" here for most of the rivets. The long reinforcement bars get in the way of seeing the rivet as it gets bucked. Since I could still see my hand on the bucking bar, I tried to keep the bar at a visible 90 degree angle on all sides while riveting. This worked well.
|
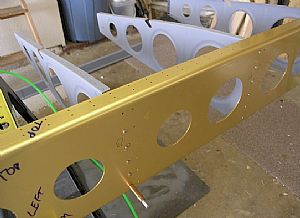
 Phew!! Glad that's done! Phew!! Glad that's done!
Then I moved the whole rig back to the work table and clecoed the rear spar back on.
|
 Started riveting the rear spar to the ribs Started riveting the rear spar to the ribs
Now I was able to use my pneumatic rivet squeezer to put in the rivets. It almost felt like cheating after the rivet/buck routine I had just gone through.
|
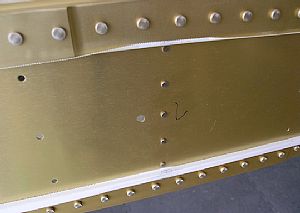
 All done! All done!
The whole rig really firmed up after getting the rear spar on. I had to pay close attention to the plans as which rivets to "not" put in.
|
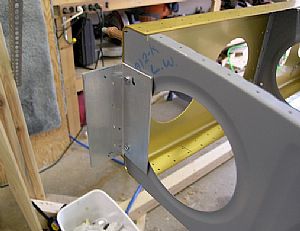 Now to mount the rig on to the wing jig. Now to mount the rig on to the wing jig.
I cut a 5 inch piece of aluminum angle and used one the existing 3/16 holes in the outer rib to mark the first hole in the aluminum angle and drilled it out. Then it was just a matter of temporarily attaching the angle to the rib and drilling the other hole through both the angle and the rib with a 3/16 drill bit. Then I bolted it all together.
|
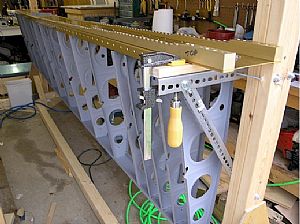 Put the rig on the jig (no poetry intended) Put the rig on the jig (no poetry intended)
This is what I have been waiting for! Even my kiddo said "Cool!" when he came into the garage. Then I started leveling everything up, putting wedges here and there on the wing jig.
|
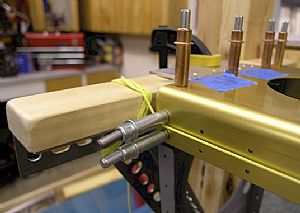 Getting everything lined up Getting everything lined up
I put a cleco into one the holes on each end of the main spar and stretched some (neon) nylon string between them. This will give me a visual line using the rivet holes in the main spar as a go by.
|
 Leveled the rig on the jig (sorry, I had to say it again) Leveled the rig on the jig (sorry, I had to say it again)
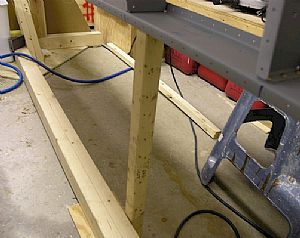
I got a 2x2 board and marked the existing distance (with the sag) between the floor and the rear spar. Then measured the distance that the rig was sagging using the string as a go by. I added that distance to the mark I had just made on the 2x2 and cut the board. I stuck the leg under the rear and it came out perfect. Now for them sheets!
|
Home Previous Entry Next Entry Back
|


