RV-9A: Electrical - 12/18/2010
Home Previous Entry Next Entry Back |
Share on:

|
|
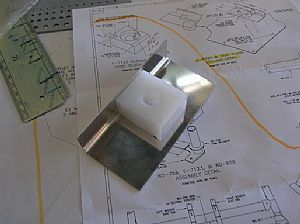 Time to install the trim control Time to install the trim control
I know that this doesn't necessarily fall under the category of "Electrical", but for me it does. In order to put on the control stick grips with the push-to-talk button in them, all this control stick stuff has to be in place. Here I just finished drilling the 2 bolt holes into the pivot block and chamfered the edge so it will fit nicely into the trim bracket.
|
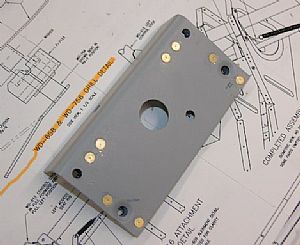
 Time to drill some holes into the trim bracket Time to drill some holes into the trim bracket
The trim bracket has to be matched drilled to holes in the bottom of the F-939 seat floor and large hole drilled into both parts for the assembled trim control assembly. I marked the back of the bracket where the holes need to be drilled and then matched those markings to the holes in the seat floor.
|
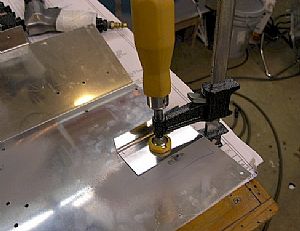
 Holes all drilled Holes all drilled
I set my drill press on the slowest speed and drilled all the holes, including the large hole in the middle using a unibit.
|
 Drilled out the nutplates in the center floor ribs Drilled out the nutplates in the center floor ribs
These nutplates will be replaced with the new nutplates on the trim bracket. I also had to use my hand squeezer with flat dimple dies to "un-dimple" the rivet holes in the flange of the floor rib.
|
 More holes drilled into the trim bracket More holes drilled into the trim bracket
Here I've clecoed the trim bracket to the existing holes in the floor ribs and drilled 2 new holes into both the floor rib and the trim bracket. These holes drilled into the trim bracket will have nutplates installed on them.
|
 Here's the finished trim bracket Here's the finished trim bracket
I primed the bracket and installed all the nutplaces on the back.
|
 Bend the control arm on the trim weldment Bend the control arm on the trim weldment
The RV-9 control arm gets bent up and the RV-7 down.
|
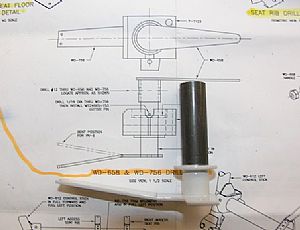
 Drilled the bolt into the WS-658 and WS-756 Drilled the bolt into the WS-658 and WS-756
This was a head scratcher. How do you drill a hole into a 2 pieces of tubular steel, keep the pieces from not turning, make a straight (perpendicular) hole into 2 pieces of pipe that lay crooked in the jig and get the hole started in the first place? Phew! That was a mouth full. Here's my solution. I wrapped duct (aeronautical) tape around the two pieces of pipe to make sure they stay lined up. Then I put more duct tape on the smaller piece of pipe untill it matched the diameter of the larger piece of pipe. This makes the whole thing lie correctly on the jig. I took and old wooden pipe jig and cut off just enough of it so it would fit inside the control gizmo on the pipes. Then I used my hole punch to established a mark through the tape onto the pipe to prevent the drill bit from wandering.
|
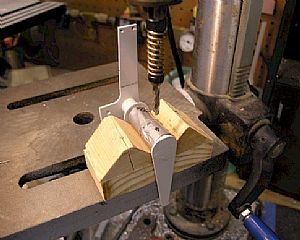
 Put the lower control assembly together Put the lower control assembly together
First, I used a new 3/8 drill bit to make a slot in the side of the pivet block so I could have access to install the cotter pin into the control weldment pipe. I held the pivet block up against the 3/8 drill bit in the drill press untill it dug deep into the side of the pivet block. Then I used my bandsaw to cut a slot into the pivet block. This slot allows the long bolt (not yet installed) to put the "squeeze" on the control assembly so it will firm up the turning of the control knob by the pilot. Then I put the control weldment into the pivet block and put in a large washer. This allowed me to mark the pipe showing where to drill a 1/16 inch hole into the control weldment pipe for a cotter pin.
|
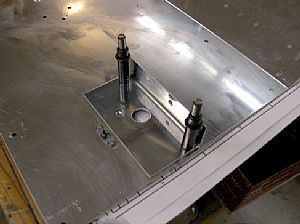
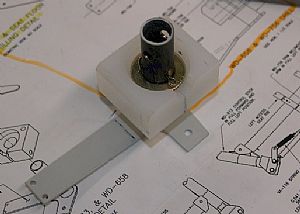
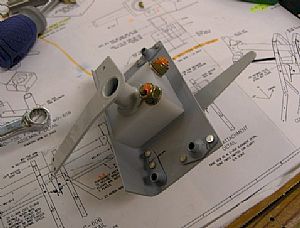 Here's the whole control assembly Here's the whole control assembly
A lot of work for one little part.
|
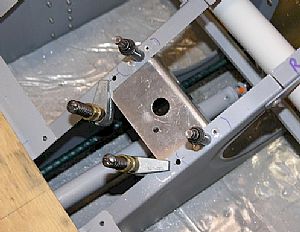
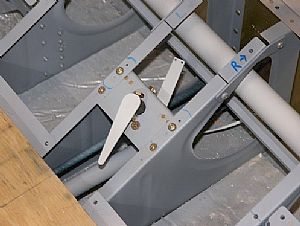 Installed the control assembly on the floor ribs Installed the control assembly on the floor ribs
The control knob will be removed later to install the floor panel.
|
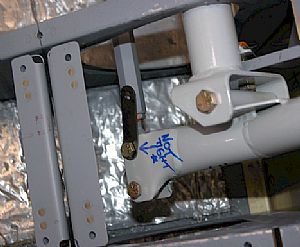 Put on the C-606 control arm Put on the C-606 control arm
This control arm has to bent out a little away from the main control system. NOTE: This little dude gets a spring put on it later in the instructions. I wish I had installed the spring on it before bolting this thing into place. In order to install the spring onto the C-606, I had to get inside the cockpit, with my knees in my face, bending way over. putting my fat hands into a tight space and cussing a lot. If my RV ever develops it's own personality, it will think that it's name is "Dammit".
|
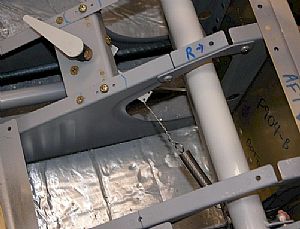 Putting it all together Putting it all together
I ran to my friendly neighbor aircraft parts store (20 miles away) and bought some .041 stainless steel safety wire and tied the right side of the control to the spring disCUSSED earlier, keeping a little tension on the spring.
|
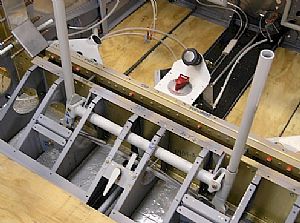 Thar' tis Grandpa! Thar' tis Grandpa!
The opposite side safety wire install was a little tricky. I had to determine the length of the safety wire by trial and error. If the safety wire is the correct length to the spring, the control sticks should stand up perfectly straight and the center trim contol knob should stay centered. Ah yes, another opportunity for yours truly to continue blessing his creation.Update: 1/1/2011 - I received an email from one of my fellow RV builders about the trim control being a little too loose, so I tightened the bolt that that puts tension on the trim control knob. Now it stays centered while slightly moving the control sticks, unless I go full left or right on the sticks.Here's a short video showing how it all works:
RV-9A Control System from Smitty Smith on Vimeo.
|
Home Previous Entry Next Entry Back
|


