RV-9A: Electrical - 1/1/2011
Home Previous Entry Next Entry Back |
Share on:

|
|
 Time to put in the ELT Time to put in the ELT
I found this ELT mount on Van's. I bought my ELT a long time ago and since I'm doing electrical stuff and this unit comes with a panel switch, I decided to install it now. Here I've scotchbrited and sanded the edges and primed the bracket.
|
 Enlarged the holes on the ELT mounting bracket Enlarged the holes on the ELT mounting bracket
In order to use the screws provided in the mounting kit, these holes need to bigger.
|
 Installed the nutplates Installed the nutplates
The ELT bracket gets screwed to these nutplates.
|
 Installed the mount Installed the mount
I pop-riveted the bottom from behind first by pushing the mount out away from the fuselage. Then I drilled holes into the top of mount and through the "J" channel on the fuselage. Then I pop-riveted the top of the mount.
|
 Installed the ELT bracket onto the mount Installed the ELT bracket onto the mount
|
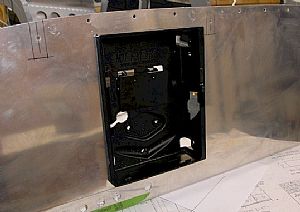
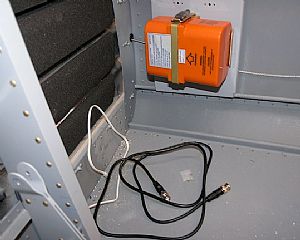 Mounted the ELT onto the bracket Mounted the ELT onto the bracket
It's not a great fit. The round head screws provided in the kit that hold the bracket to mount, push on the ELT casing, which makes the bracket bend a little abnormally. But what the heck, it works. The white wire is a standard phone wire, which I ran through the middle of the fuselage to the front panel. I will probably run the antenna cable to the rear of the fuselage and install the antenna on the next-to-last bulkhead underneath the big fiberglass fairing.
|
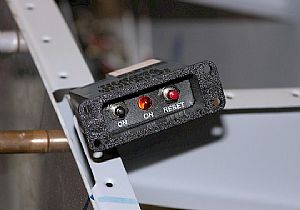 Here's the panel control for the ELT Here's the panel control for the ELT
I wish I had one of these on my Cessna.
|
 Now, back to the panel Now, back to the panel
Holy crap, it's time to start cutting holes in the panel and I don't know what I'm doing. I got some typing paper and cut out templates of all the components that I want in my panel. (Sorry, no picture of this). I laid the paper templates out and determined the center most component, which will be the Garmin 696 Air Gizmo Panel Dock. I marked where the mount goes on one corner on the panel with a fine point sharpie. Then I put some painters tape on the panel to protect the surface from the jigsaw I will use. I could see the sharpie mark through the tape and drew the lines for the cutout onto the tape. Then I carefully cut the panel right up next to the marks I made without cutting into the marks.
|
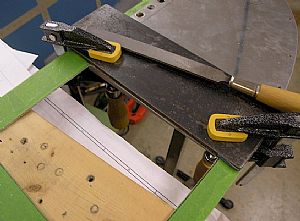 OK, the hole is cut. Now what? OK, the hole is cut. Now what?
Then it hit me. I need a straight edge. I got my back-riveting steel plate and a scrap piece of aluminum angle and clamped the steel plate to the panel, right on top of the sharpie line. Then I started filing away at the edges on the panel cutout until it was even with the edge of the steel plate. Since the aluminum is softer than the steel, this working quite well.
|
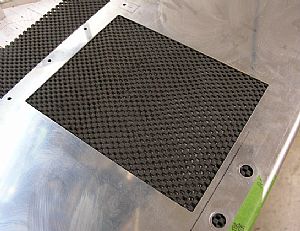 Cool! It worked Cool! It worked
I rounded the inside corners with a small round file that I got from Lowes and cleaned up the edges with some fine grit sandpaper. Looks pretty good, even if I do say so.
|
 Trial fit of the AirGizmo Panel Dock Trial fit of the AirGizmo Panel Dock
Phew! It fits!
|
Home Previous Entry Next Entry Back
|


