RV-9A: Tail Feathers - 2/22/2010
Home Previous Entry Next Entry Back |
Share on:

|
|
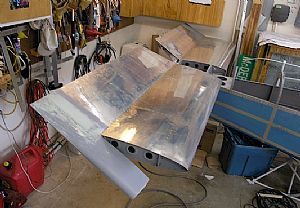 Time to start work on the elevator rigging Time to start work on the elevator rigging
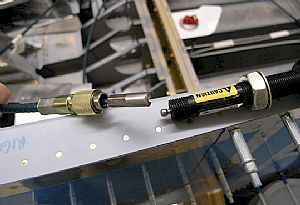
So I thought. Then I read where the push rod needs to be primed on the inside and set aside to dry for a couple of days. So I primed it just like I did on the wing push rods and move on to the next section, the vernier trim cable install.
|
 First things first First things first
Many moons ago I messed up on the bends on the elevator rod inside the trim tab hinge. So now I get to try again, using the rods that come with the fuselage kit. I put the rod in the vise and whacked it with a hammer until I got the shape I wanted. Then all I had to do was tie it down. Piece of cake.
|
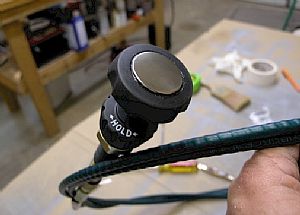
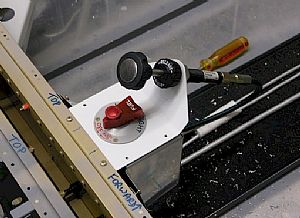
 The mysterious vernier control The mysterious vernier control
Why mysterious? Because I don't know Jack about them. None of the airplanes I have flown had one. First off, the instructions say to remove the button from the center of the knob to disable it's ability to "let go" of it's current setting. Sounds like a mental disorder remedy. The instructions also say to "Pry up the rubber button with a small screwdriver". I tried and tried to do this and couldn't do anything except put scratches on the outer plastic knob. So I just cut the damn knob off with my pocket knife. Just as I did, the knob spilled it's guts (or gut) and the buttom rod fell out. I immediately thought "Oh crap, I broke it!". Nope, that's just what needed to happen.
|
 Cover your hole Cover your hole
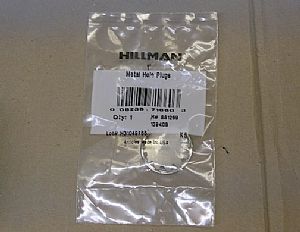
Now I need to "Replace the rubber button with a 1" chrome snap-in hole plug from the local hardware store". I'm off to Lowes Lumber and Aircraft supply! I have found more neat and weird little parts in the nuts and bolts section of Lowes. Directly across from the nuts and bolts, there is lonnnnggg cabinet that has all sorts of odds and ends in the realm of strange, and hard to find, metal and plastic dodads. That's where I found just what the Doctor (Van) had ordered.
|
 Time to put on the snap-in hole plug Time to put on the snap-in hole plug
Nope, not gonna' happen. Everytime I tried to put it on, the rubber that I left inside the knob just pushed the button off. Dammit! So I decided that the rubber needs to come out after all. So I grabbed my small needle nose pliers and starting pulling out the rubber in small chunks until I got enough clearance for the snap-in hole plug to fit. This rubber has the same consistency as a nipple on a baby bottle. If you ever get a grip on a hunk of it, you could stretch out like a kid pulling chewing gum out from his teeth. After I finally got enough clearance for the snap-in hole plug to fit, it wouldn't stay in. Dammit! (#2). So I mixed some of that quick setting cement and glued the damn thing in place. I also used the same cement to fill in the gap around the snap-in hole plug to close the empty space between the knob and the snap-in hole plug.
|
 Done! Done!
$%^&, ^&*#^% and #$%^. Ah, I feel better...
|
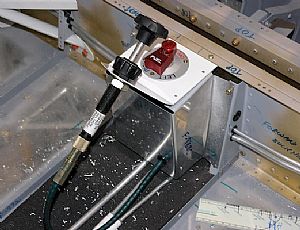
 Ah, yet another dark mystery revealed! Ah, yet another dark mystery revealed!
I know by looking at the control that the knob end has to be taken off to mount it on the center console. But where does it come apart and how? So being the adventurous fool that I am and start loosening parts and once again I scared myself when the control fell apart again. Oh, that's "supposed" to happen! Here's where it disconnects.
|
 Thinking ahead Thinking ahead
Yes, on rare occasion, I do just that. I knew after looking at the drawings that the cable would need to pass through the center console cover. So, using the main fuselage bulkhead hole as a go-by, I made this hole using my Unibit.
|
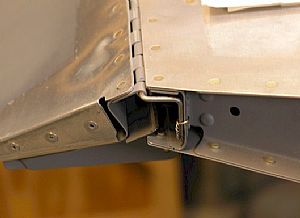
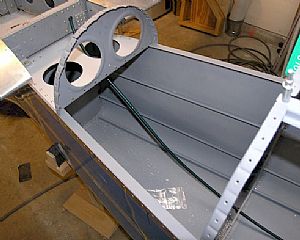
 Installed the cable! Installed the cable!
Looks pretty good! I can tell that the cable doesn't like this drastic bend, but it seems to work just fine.
|
 Another view Another view
Please excuse the metal shavings. I'm just too lazy to clean up sometimes.
|
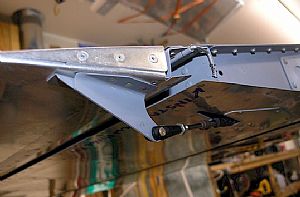
 The cable run The cable run
|
 The end... The end...
On the next RV, Electric Trim Baby!! All this trouble is not worth saving the money. Ya'll come back now, ya hear?
|
Home Previous Entry Next Entry Back
|


