RV-9A: Left Fuel Tank - 8/14/2006
Home Previous Entry Next Entry Back |
Share on:

|
|
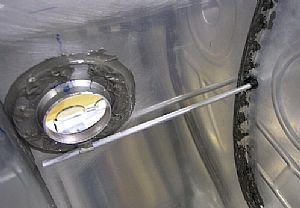
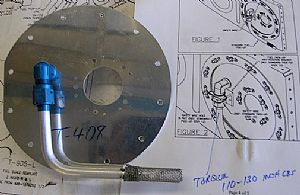 Time to start work on the fuel pick-up tube Time to start work on the fuel pick-up tube
I pulled the parts and temporary put them together (hand tight) just see how things fit together. This picture also shows the recommended torque setting for the fitting. I put this shot in here so I won't have to look it up again when I start on the right tank. I ordered these pre-fabricated pick-up tubes from Vans. I trust their design more than my pick-up tube creating abilities. The drawing came from the RVator magazine. It shows the wire tie down required now for the pick-up tube. You�ll notice that the fitting already has the hole drilled for the safety wiring, courtesy of Vans. This is in accordance with the Mandatory Service Bulletin(SB 06-2-23) where Van says to safety wire the AN818-6D coupling nut, it also says to torque the coupling nut 110-130 inch lbs. Which is a higher torque setting than the standard setting recommended in Section 5P (Aluminum Tubing) of the instruction manual.
|
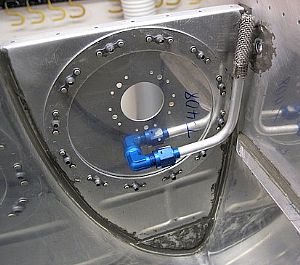 Checked the fit Checked the fit
I put the whole assembly in place with a couple screws to check the fit of the tube in the tank. Now for the creation of the T-915 anti-rotation bracket to hold the the tube in place.
|
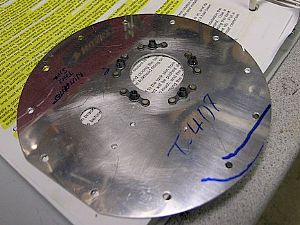
 Making the T-915 anti-rotation bracket Making the T-915 anti-rotation bracket
I found the material in the �9 Wing Sub-kit #8� zip lock bag. The part itself is not marked as instructed (�AA6-125x1x1�). But it was pretty easy to determine that this is part using the process of elimination. The bracket has to be 1 inch in width. The part I pulled from the bag is exactly 2 inches in width, so I cut it in half with my band saw. I had to go really slow. That dude got hot in a flash. After cutting out the part, I used my fancy drill bit in the drill press to make the hole for the fuel tube. It cuts holes in stages, one size at a time. Then I drilled one of the rivet holes in the back of the bracket.
|
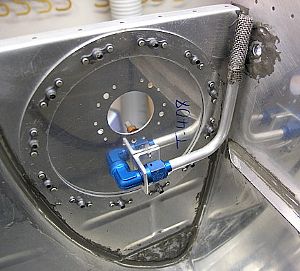 Final drilled the anti-rotation bracket Final drilled the anti-rotation bracket
I put the whole assembly together and used a #30 drill bit to put in the other rivet hole in the anti-rotation bracket, from the rib into the bracket. Looks like a good fit. All of these fittings are still only hand tight and the bracket is held in place with clecos.
|
 Put in the nutplates for the float type fuel sender. Put in the nutplates for the float type fuel sender.
After countersinking the plate for the flat head rivets, I used my 4 inch yoke and hand squeezer to attach the nutplates. The instructions never really said to "do this now", so I'm winging it on my own. Sorry, no pun intended on "winging it".
|
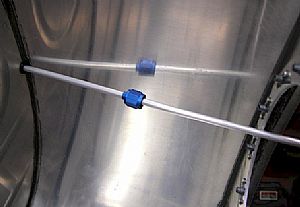
 Starting messing around with the tank vent line. Starting messing around with the tank vent line.
I was amazed at how soft this tubing was. It was very easy to work with. I un-rolled and straightened a 5-6 foot section of tubing and then put in the black plastic hole collars into the ribs. Then I started pushing the tubing into place, through the large access plate hole in the inboard rib. I didn�t have to use the bending springs at all. The tubing straightened out nicely just using my hands.
|
 That�s enough for one day. That�s enough for one day.
The temperature gauge on the wall just hit the 100 degree mark. On the inboard end of the tank, I went ahead and slide on the 2 fittings onto the tube. There is nothing worse that finding out that you forgot to put on the fittings after a flare is made. I learned that from messing around with regular plumbing. Tomorrow I will drill the hole in the inboard rib and do the bends and flare on the tube for the inboard rib connection.
|
Home Previous Entry Next Entry Back
|


