RV-9A: Electrical - Part 2 - 5/30/2011
Home Previous Entry Next Entry Back |
Share on:

|
|
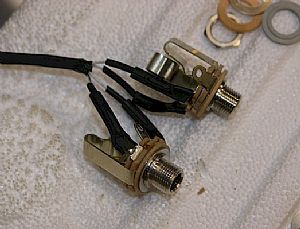 Time for the Headset Plugs Time for the Headset Plugs
Here are the headset plugs all wired and ready to install. I forgot to take pictures of my wire runs from the intercom to the arm rests and the control sticks. Sorry bout' that. If you decide to use Van's wiring harness for the intercom, the instructions are very clear on how to run all the wires in the harness.
|
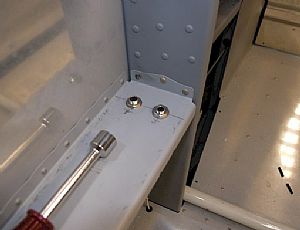 Installed the plugs Installed the plugs
I used this 1/2 inch screw driver to tighten the nuts on each plug. It allowed me to get a nice tight fit while holding the plug from below, keeping it from twisting the wires while being installed.
|
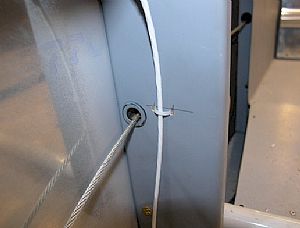 Keeping the headset away from the rudder cable Keeping the headset away from the rudder cable
A simple solution with a cable tie, also in Van's instructions.
|
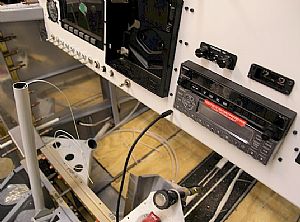
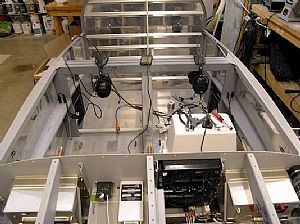 Now for the big test Now for the big test
The battery is already grounded the airframe, but the hot wire is not connected to the battery. I have test cable with aligator clamps on each end, and an inline fuse in the middle of the cable. I hook the temporary cable to the positive post on the battery and the to the hot aircraft cable to complete the connection. This way if anything goes whacko, the fuse will blow and hopefully protect my avionics. I turned on the master switch and the radio switch. Hey, no smoke! I plugged in some old headsets and tried them out. They work! I also plugged in my iPhone and played music through the miniplug in the panel. The music sounds perfect! Phew!
|
 Here's the mini stereo plug in the panel. Here's the mini stereo plug in the panel.
|
Home Previous Entry Next Entry Back
|


