RV-9A: Seats and Seat Floors - 9/30/2009
Home Previous Entry Next Entry Back |
Share on:

|
|
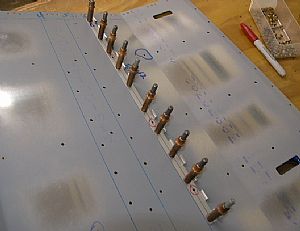 Time to rivet the F-637E hinges to the F-742-L&R aft seat floors Time to rivet the F-637E hinges to the F-742-L&R aft seat floors
I decided to rivet the hinge with the extra floor rib holes first. I marked the extra hole that gets pop-riveted to a floor rib with a red sharpie.
|
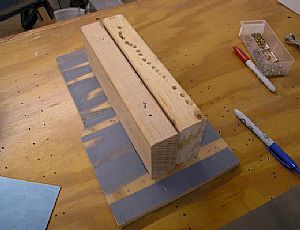 I need a jig for this! I need a jig for this!
Well, here it is. A couple of old 2x4's screwed in from the back of a 1/2 inch piece of plywood. I left a space between them for the floor seat panel to slide inside. See the holes? My son did that. He loves my drill press. You don't need those holes...
|
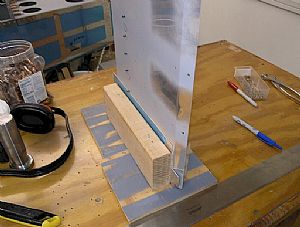 Now for the riveting session Now for the riveting session
I slide the floor seat panel into position and put an extra scrap sheet of aluminum in with it to keep it from moving around too much.
|
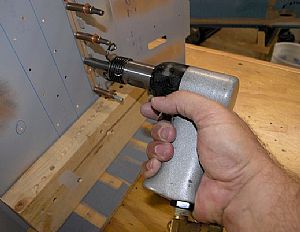 Getting the gun set just right Getting the gun set just right
I have my pressure set at 38 lbs and ready to go.
|
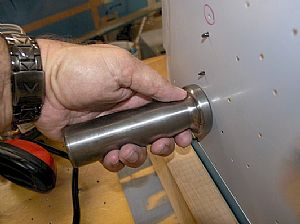 My big ass bucking bar My big ass bucking bar
This monster bucking bar is great for this type of riveting. The skin is thin and the hinge tends to bend too easily. If I use a lighter bucking bar, the skin and the hinge will start bending out of shape and look like crap. So, in this case, I am concentrating on the rivet, caught between the rivet gun and the bucking bar, applying equal pressure on each end of the rivet, using my arms. This way the skin and the hinge is sandwiched between the ends of the rivet, making the rivet take the punishment and not the material. How do I know this??? Don't ask...
|
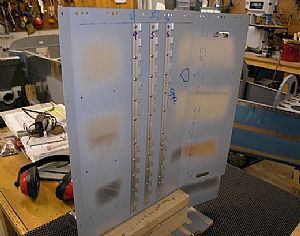 Tadah! Tadah!
Ain' that purdy?
|
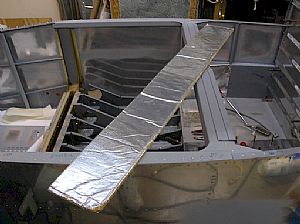 Time for soundproofing before installing the floor seats Time for soundproofing before installing the floor seats
I received a bunch of these 6"X48" Sound and Vibration Damping Panels from my good friend Bob Rogers, who has just completed his Mustang II and is now flying off his 40 hours.
|
 Peel and stick. You can't beat it for easy installation Peel and stick. You can't beat it for easy installation
This panels have polyurethane damping foam with an aluminum foil backing. They also have adhesive on the foam backing with a peel-off paper covering. They are fireresistant and self-extinguishing. But, they are a little heavy. 4 - 6"X48" panels weigh over 2 1/2 pounds, mainly because of the heavy aluminum foil backing. I will probably use the black soundproofing foam for the rest of the aircraft, since it is so light.
|
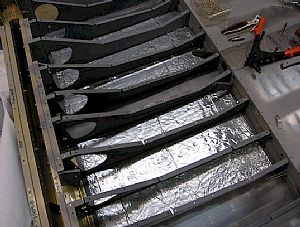
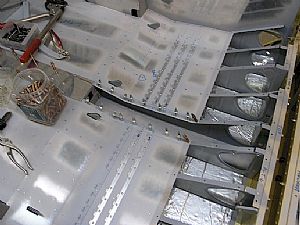 Pop-riveted on the floor panels Pop-riveted on the floor panels
This was a long "bending over" session, but it was very easy. Tomorrow I will rivet on the nutplates between the seats.
UPDATE 3/1/2010: Hold the phone! Now that I'm thinking about avionics, I should have put some conduit under these panels. If you are going to put some glass panel stuff in, some of the accessories associated with those items have to behind the baggage panel, to avoid magnetic interference from the engine. Extra conduit allows you to run additional cables. Dammit!
|
Home Previous Entry Next Entry Back
|


