RV-9A: Left Wing Prep - 3/11/2006
Home Previous Entry Next Entry Back |
Share on:

|
|
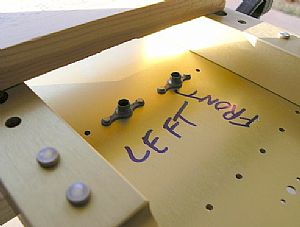 Attached 2 center section platenuts Attached 2 center section platenuts
There is a vertical bar that will screw into these platenuts later in the construction.
|
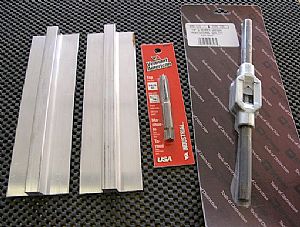 Started work on the 2 Tie-down Bars Started work on the 2 Tie-down Bars
The instructions say to "tap" one end of the bars to receive the tie-down ring. Since I've never "tapped" before, I knew I would need help. I went to a huge hardware store in town where they hire retired gentlemen who freely offer up their expertise to us not-so-young guys who don't know what the hell they're doing. I went up to an elderly gentlemen in the tool department and said "I have to get a tap thingy to fix up an aluminum bar thingy that has a pre-drilled hole in it so a bolt thingy can get screwed into it". He looked at me for a long time and then smiled. I could tell he was already mentally questioning my level of competence in this matter. He took me to the tap tool section and got what I would need and started telling me how to use it, knowing that I was probably incapable of figuring it out on my own. I luv this store!
|
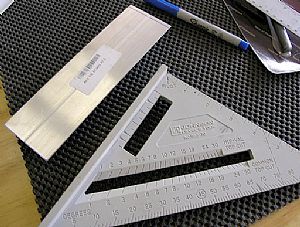 Checking for squareness Checking for squareness
Before cutting the end off the bars to the recommended length, I decided to check the ends for squareness. Sure enough, it weren't square! So I used my builders square to mark one end of the bar, making sure that I had enough left on the other end for the final cutoff. I used my table mounted bench sander to square off the crooked end. Then I marked the other end and cut the bars to the proper length.
|
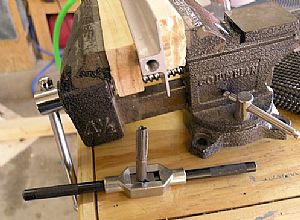 Time to tap dance Time to tap dance
Using the good advice of gentleman at the hardware store, I put the Tie-down bar in my vise between 2 blocks of wood. I put some oil in the end of the bar hole and on the end of the tap tool. I put the tap tool into the hole and started screwing it in, making sure that I was going in straight and not wabbling around. After I went in about 3/16", It got harder to turn (as predicted) and I backed it out completely. Then I used my air nozzle to blow away the aluminum shavings. Then I put more oil in the hole and on the tap tool and went back in. I repeated this procedure over and over again until the hole was fully tapped. It turned out damn nice, if I do say so.
|
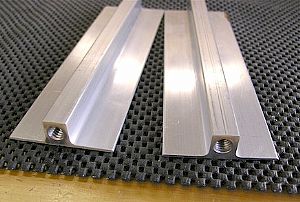 The finished product The finished product
After I tapped the holes, I sanded the edges and got everything nice and smooth. I also had to run the end of the tapped hole over the scotchbrite wheel to remove some of the burrs that resulted from the tapping.
|
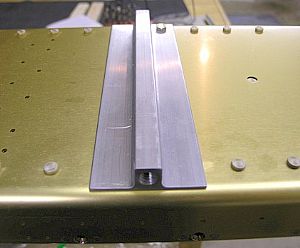 Drilled one pilot hole into one of the tie-down bars Drilled one pilot hole into one of the tie-down bars
I put the other tie-down bar away for when I start working on the right wing. I drill a pilot hole with a #12 drill bit and positioned the tie-down bar on the wing spar. The holes already drilled in the wing spar will be used to drill the needed hole in the tie-down bar. Tomorrow I will finish drilling the rest of the holes and started putting on the platenuts.
|
Home Previous Entry Next Entry Back
|


