RV-9A: Left Wing Prep - 3/10/2006
Home Previous Entry Next Entry Back |
Share on:

|
|
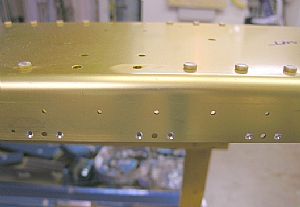 Started work on attaching the Access Plate Platenuts Started work on attaching the Access Plate Platenuts
I used my Microstop Countersink Cage with #40 countersink bit and did all the platenut holes.
|
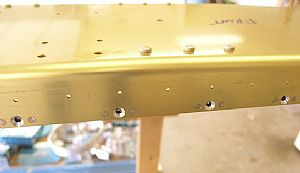 Riveted on the access plate platenuts Riveted on the access plate platenuts
As before, I used my hand squeezer with the no-hole yoke to squeeze the rivets on the platenuts. Then I countersinked the center hole with the same #40 countersink bit. Just like the tank platenuts, the #40 bit tip is smaller than the hole it goes in to. This time, I countersunk one of the center holes to the depth of a #6 screw, then using the setting of the full cut on the Micro Stop Countersink Cage, I started on the other platenut center holes on the spar. I used small bursts on the drill to get the hole to the full depth of the Microstop Countersink Cage. I noticed that if I went for one full burst without stopping, the #40 countersink bit wallered around and did not make a perfectly round countersink.
|
 Made a hole checker out of some scrap Made a hole checker out of some scrap
I used my #6 dimple dies to dimple a hole in this piece of scrap and used it to check my depth on the platenuts center countersinks on the wing spar.
|
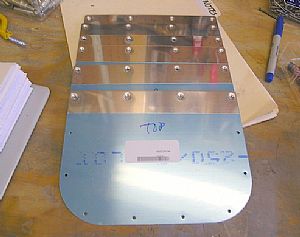 Dimpled all of the access plates for a #6 screw Dimpled all of the access plates for a #6 screw
I decided to go ahead and dimple all of the access plates for both wings, even though I'm only building one wing at a time. I orderd a set of #8 dimple dies from Averys to do the rest of the dimples in the plates.
|
Home Previous Entry Next Entry Back
|


