RV-9A: Left Wing Prep - 3/6/2006
Home Previous Entry Next Entry Back |
Share on:

|
|
 Started work on the Left Wing! Started work on the Left Wing!
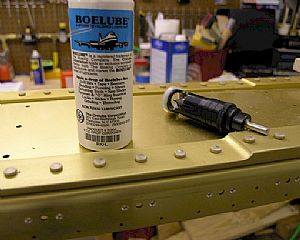
Ya' know..., ya' ain't gonna get pampered no more with detailed instructions when ya' start them there wings. The instructions start off with "Rivet the tank skin attach platenuts to the spar...". I reckon Van figures I ought to know what the hell I'm doing by now, after building that there tail kit. And ya' know, they's right, I went right to work. I used my Microstop Countersink with a brand spanking new #40 countersink and countersunk the platenut holes after drilling the holes out with a #40 drill bit. Oh yeah, I bought some Boelube to put on the countersink bit. I hear it makes the drill and countersink bits last longer.
UPDATE 12/1/2006: Hint Hint, the the Right Wing section is a little more informative that the Left Wing section of this website. In other words, I knew what I as doing on the right wing after learning on the left wing.
|
 Read the dang instructions, ya'll! Read the dang instructions, ya'll!
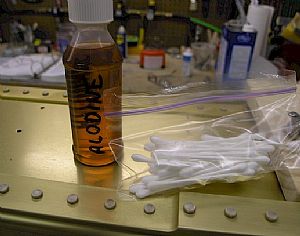
Well, I almost screwed up. I just happened to read the whole "Preparing the Main Spar" section before riveting on the platenuts. About 4 instructions down, it says to "Spot prime all countersink holes where the anodizing has been removed". I reckon that should have been instruction number one. It reminds me of that test we all took in junior high or high school where the teacher passed out a weird test with all sorts of strange instructions, like "Stand up at your desk and state your name out loud". Of course the first instruction said to read the "ENTIRE" test before starting the test. If you did read all the test questions, the last instruction said to ignore the other questions, sign the test and turn it in. Ya' know I flunked that one. I found one of my kiddos cough medicine bottles and put some Alodine in it. Then I dabbed the countersunk holes with a Q-tip.
|
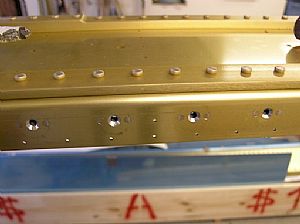
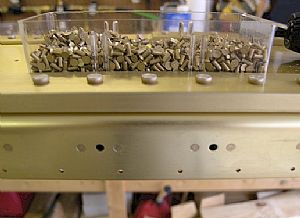 Riveted on the tank platenuts Riveted on the tank platenuts
I used my no-hole yoke and the Avery hand rivet squeezer and went to town. UPDATE: 12/1/2006 Hold the phone... Go to this page to see how I did the right wing main spar nutplates.
|
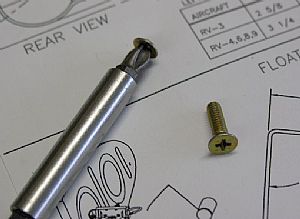 Time to start countersinking the spar for the big #8 fuel tank screws Time to start countersinking the spar for the big #8 fuel tank screws
The instructions say to saw off the head of the one tank screws and use it as a pattern to know how deep to make the countersink for the #8 tank screws. I used one of my magnetic phillips bits to hold the sawed off screw head. UPDATE 12/1/2006: This is a total waste of a screw. I got a scrap piece of sheet aluminum that was the same thickness as the tank and put #8 dimple in it to use as a hole checker. When it came time to put the tank on, I had to ream these holes out more than there were, using the hole checker as a guide.
|
 Did the countersinks Did the countersinks
The instructions say to use a #30 countersink bit to make the cuts. The only problem is that the countersink tip is smaller than the pre-drilled spar hole and it wallers around like a pig in fresh mud. This makes the hole really crooked on the edges, almost square. The trick I found was to start off countersinking with the countersink cutting edges barely touching the spar around the hole. Then I adjusted the Micro Stop Countersink with small quarter turns and countersunk the hole a little at a time. All the holes came out nice and round, cept' for one, the one who showed me that I was doin' it wrong. UPDATE 12/1/2006: When I started on the right wing spar, I tried a different approach on these countersinks. I set the final depth of the countersink on the Microstop Countersink after a trial cut. Then I started cutting the countersinks using short bursts with the drill. Right away the countersink bit danced wildy around in the pre-drilled hole and look like crap and not perfectly round. Right before the final finish cut, I held the countersink very gently against the hole, just barely touching it, and let the drill rev as high as it go. This made the hole perfectly round, where before it was getting badly distorted by the initial countersink. Then I checked the depth of the hole by using a scrap piece of aluminum that was the same thickness as the tank skin, with a #8 dimple in it.
|
Home Previous Entry Next Entry Back
|
SmittysRV.com is an Amazon Associate
|


