RV-9A: Left Elevator - 2/16/2006
Home Previous Entry Next Entry Back |
Share on:

|
|
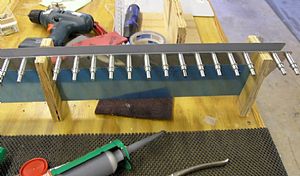
 Prosealed in the foam wedges Prosealed in the foam wedges
Once again, I forgot take pictures. I mixed up some proseal and put a layer of it on the wedges and placed them inside the trim tab skin. Then I made the wooden clamps according to the plans and put everything together. One thing that I need to mention about the caulk gun I used. I noticed that after mixing the Proseal, I didn't have the blue caulk that I used on the right elevator in the shop, so grabbed another one that I had laying around. The push plunger wouldn't go into the end of the tube. I made a mad dash to lowes and got another one that had a smaller pusher. This one worked but it was really tight inside the proseal tube. I suggest that if you use a caulk gun like I did, get one where you can rotate the push rod inside the gun. Then you can file down the pusher disk on the end to fit inside the proseal tube. No need to buy the expensive one made for doing proseal. One other thing, that Proseal stuff starts to setup right after you mix it. I was only gone for 10 minutes and I noticed that it was a little thicker than the last time used it.
|
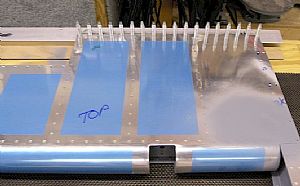
 Prosealing the left elevator trailing wedge in Prosealing the left elevator trailing wedge in
Knowing that I had to proseal the trim tab, I decided to wait until I got to that point and do the elevator trailing edge at the same time. Just as before, I placed a wooden dowel rod in the mouth of the trailing edge opening so I could get the wedge with the proseal into position. Then I slipped the dowel rod out, allowing the trailing edge to close in around the aluminum wedge. Then I clecoed everything down to the aluminum angle and the wooden block below.
|
Home Previous Entry Next Entry Back
|
SmittysRV.com is an Amazon Associate
|