RV-9A: Left Elevator - 1/11/2006
Home Previous Entry Next Entry Back |
Share on:

|
|
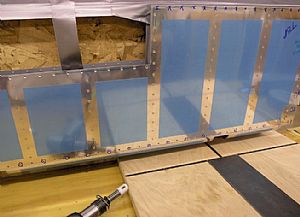
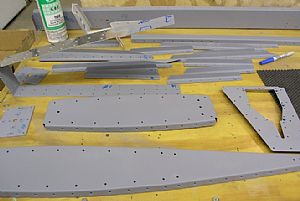 Primed the Left Elevator Inerds Primed the Left Elevator Inerds
Today I had some off time to work non-stop on the RV. You know you're having fun when you forget to eat or pee. I put on my double filter rubber mask that I got Lowes and primed the inerds on a hunk of plywood layed on top of some saw horses in the driveway. I can't smell a thing using that mask.
|
 Finished dimpling the Left Elevator skin Finished dimpling the Left Elevator skin
Datsa' lot of holes in one skin!
|
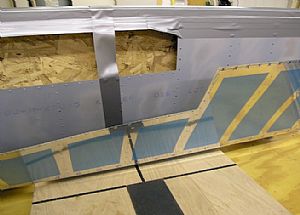 Prepared the skin for back riveted the top stiffeners on Prepared the skin for back riveted the top stiffeners on
I still had my backboard thingy that I had used for the Right Elevator. I taped the bottom of the elevator skin to the backboard. Now all I have to do is pull the top part of the skin down onto the back riveting plate to rivet on the stiffeners.
|
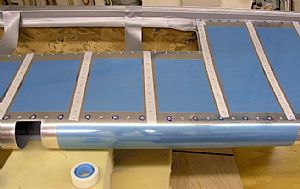 Laid in the rivets and tape them down Laid in the rivets and tape them down
I put some hunks of foam rubber under the skin to lift it up to put the rivets into the holes and them tape them down with the Scotch Removeable Tape that I got from Averys. I found out later that you can get the same tape from any Office Depot (21 cents cheaper - big whoopee).
|
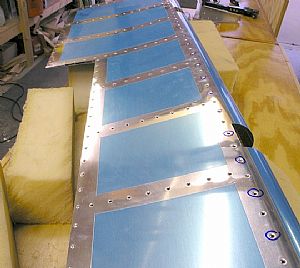
 Started back riveting the stiffeners Started back riveting the stiffeners
It was easy to pull the elevator skin down in position to back rivet the stiffeners on the plate. I know now from working on the right elevator that I could "push the envelope" on how far you can open these elevator skins. They are pretty flexible and can be openened quite a bit (within reason). The weird part is that if I positioned the back rivet gun perfectly vertical, the rivet went in crooked. I had to lean the gun a little towards the upward stiffener flange in order to get a perfect back rivet.
|
 Perfect! Perfect!
Even if i say so. No brag, jes' fact.
|
 Riveted the E-903 and E-904 rib webs together Riveted the E-903 and E-904 rib webs together
I had to remove the bottom dimple die to get the Rivet Squeezer over the outer flanges of the ribs. Then it was matter of putting the dimple die back in and squeezing of the rivets. Then I took the bottom dimple die out to get the rivet squeezer out from inside the rib webs.
|
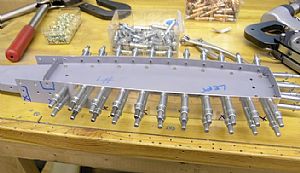 Riveted the E-913 counterbalance skin to the ribs Riveted the E-913 counterbalance skin to the ribs
I used my no-hole yoke on the hand squeezer to rivet the counterbalance skin to the ribs beginning at the counterbalance leading edge and working aft.
|
 Done! Done!
I left the last six holes open for attaching to the left elevator skin.
|
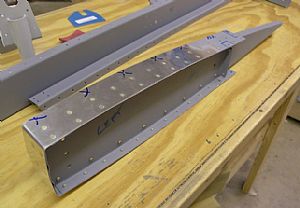
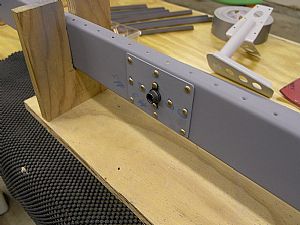 Riveted on the reinforcement plates and nutplates to the main spar Riveted on the reinforcement plates and nutplates to the main spar
This was a breeze with the Avery rivet squeezer
|
 Riveted on the control horn to the main spar and end rib Riveted on the control horn to the main spar and end rib
I put my no-hole yoke on the pneumatic rivet squeezer and had no problem putting in these rivets.
|
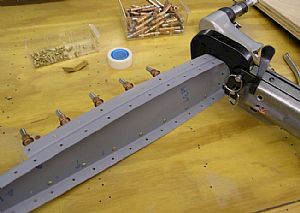
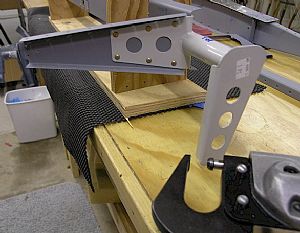
 Riveted the completed main spar to the Left Elevator skin Riveted the completed main spar to the Left Elevator skin
Well almost. I was able to use a combination of the Avery 4 inch yoke and the no-hole yoke to get the majority of these rivets in through the holes in the forward end of the skin and each opening on the ends. Tomorrow I will have to use my rivet gun and bucking bar to get the rivets in where you see the clecos.
|
Home Previous Entry Next Entry Back
|


