RV-9A: Tail Feathers - 2/19/2010
Home Previous Entry Next Entry Back |
Share on:

|
|
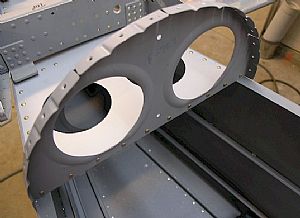 Riveted on the F-709 Bulkhead Riveted on the F-709 Bulkhead
The instructions don't mention about when to rivet this bulkhead on, so I'm doing it now. It kind of makes sense to get this out of the way before fitting the tail kit to the fuselage.
|
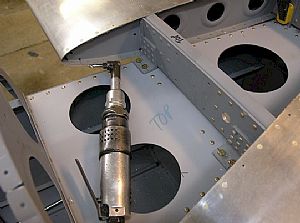 Drilled holes into the HS-908 Attach angles into the fuselage Drilled holes into the HS-908 Attach angles into the fuselage
These holes can only drilled with an angle drill. In fact, I don't know how anyone can build an RV without one. I have found that just about everytime I say "Oh, I don't need that tool", I go out and get it, out of necessity. You'll notice that I dropped some bolts in the holes I just drilled. They aren't installed. I just dropped them in the holes as I drilled, to make sure things line up.
Update: 2/23/2010: I received and email from my good buddy Robert about when to drill the holes on the HS and about getting it lined up and level. The instructions only mention measuring from the firewall back and using the tooling holes for proper height from the fuselage rear deck. I read on VAF where someone mentioned to make sure that the HS is level with the main wing spar. So I did that and found that I was off a little. So I clecoed on the 2 rear top skins and checked it again and everything was OK. I wish now I had clecoed the top rear skins on and done this leveling process before drilling these holes. The rear skins are the things that keep the HS from twisting around, not just the rear fuselage deck piece.
|
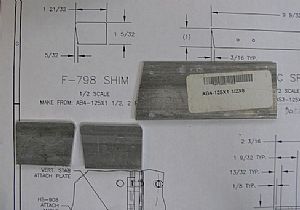 Time to make the F-798 Shims Time to make the F-798 Shims
One good thing about getting the bottom of the parts pile is being able to find stuff easier. Here's the bar that I made the shims out of.
|
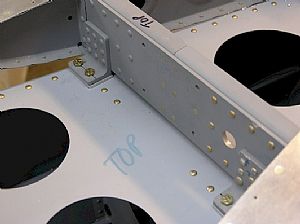 Drilled the holes into the F-798 shims Drilled the holes into the F-798 shims
I slipped the shims in place and claimed them down, making sure not to mess up the alignment of the holes I just drilled. Then I drilled the holes into the shims using the HS-908 attach angle holes as a guide.
|
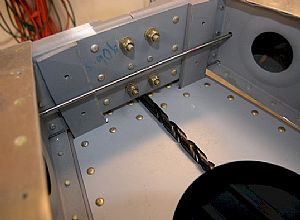 Getting setup to drill the back holes into the horizontal stabilizer Getting setup to drill the back holes into the horizontal stabilizer
The instructions say to put a 11/32" drill bit under the rear spar to establish the correct distance between the fuselage deck and the horizontal stabilizer spar. You won't find this bit in your standard drill bit set. I paid 5 bucks for this drill bit at Lowes Lumber and Aircraft Supply. You'll also notice my 12 inch 1/8 inch drill bit in the tooling holes in the HS ribs. I put one bit here and another in the front tooling holes to compare the height of the front HS spar to the rear HS spar. The measurement must be the same.
|
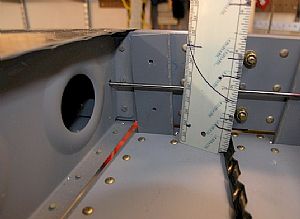 Time to measure up Time to measure up
The horizontal stabilizer has to have a zero percent incidence with the fuselage. No problem here. Everything looks perfect!
|
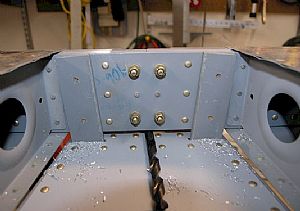 Drilled the holes into the rear spar of the horizontal stabilizer Drilled the holes into the rear spar of the horizontal stabilizer
I drilled in the initial holes through the vertical bars into the HS rear spar with an 1/8" drill bit. Then I drilled the holes to there final 3/16" size from the HS rear spar into the vertical bars from the rear. The temptation here is to use a #12 bit here. But a #12 bit is a hair larger than a 3/16" bit. So the 3/16" bit makes for a nice tight fit for the AN3 bolt that goes into these holes.
|
Home Previous Entry Next Entry Back
|


