RV-9A: Flaps - 12/29/2007
Home Previous Entry Next Entry Back |
Share on:

|
|
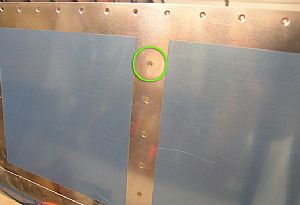 Finished riveting the right flap top skin to the ribs Finished riveting the right flap top skin to the ribs
On the left flap, I used pop-rivets for the most aft rivet because there just wasn't enough room to get a bucking bar in the small gap of the rib. So I decided to make my own small gap bucking bar for the right flap.
|
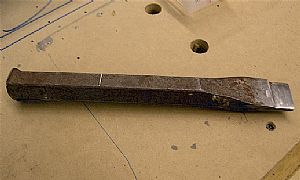 Making a silk purse out of a sow's ear Making a silk purse out of a sow's ear
I found this old chisel that I used a few years back to bust up some concrete blocks. Using a combination of my bench grinder wheel and the scotchbrite wheel, I whittled it down to a size that would fit inside the small flap rib.
|
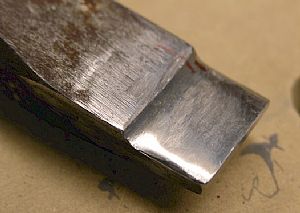 Here's the final product Here's the final product
I'm sure this new homemade bucking bar will come in handy later in the project.
|
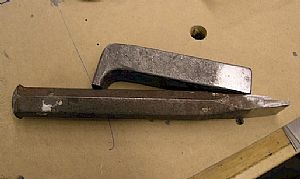 Tried it out Tried it out
I tried the new bucking bar on one of the flap rivets, but it didn't have enough mass to buck the rivet like I wanted. Time to experiment. I grabbed one of my other bucking bars and laid on top of the new homemade bucking bar.
|
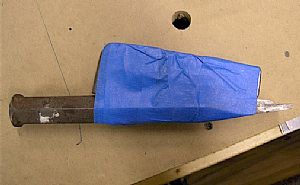 Taped the bucking bars together Taped the bucking bars together
I tried it again and it was much better, not perfect, but better. I then finished off the all the top skin rivets.
|
 Time to rivet the bottom skin to the flap spar Time to rivet the bottom skin to the flap spar
Ooooh I remember this session from the left spar. I went and got my flannel shirt and taped it to the back of my left hand with blue painters tape. I made sure to cover the whole back of my hand, including the my knuckles. Now to buck these "hard" to reach rivets.
|
 Time to pop-rivet the bottom skin on Time to pop-rivet the bottom skin on
I flipped the flap over and clecoed the aft end of the flap together with the aluminum wedge between the skins, then weighted the whole thing down with a 2x4.
|
 Done! Done!
This is one of the more enjoyable parts of building the flap. Anyone can do pop-rivets!
|
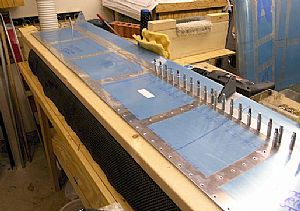
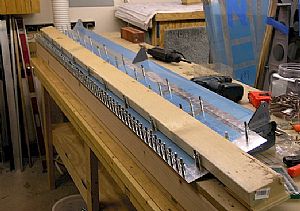
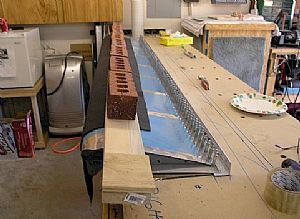 Why stop now. Time for Proseal! Why stop now. Time for Proseal!
I mixed up 40 cc's of Proseal and applied it to the trailing edge of the skins and the aluminum wedge just like a I did on the left flap. I put the masonite sheet and previously drilled aluminum angle on top of the work bench and clecoed the flap to the aluminum edge. The masonite sheet will keep the flap laying flat, since it is the same thickness as the aluminum angle. The 2x4 with the additional bricks will make sure that this dude is perfectly straight.
|
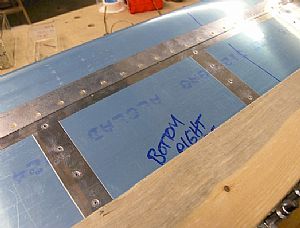
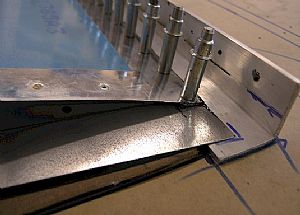 Time for a closeup! Time for a closeup!
I feel this combination of using Proseal, along with the aluminum angle is really the way to go with this loooonnnnnngggg flap. My logic is that if it worked on the rudder, it will work here. It certainly did on the left flap.
|
Home Previous Entry Next Entry Back
|


