RV-9A: Left Fuel Tank - 5/4/2006
Home Previous Entry Next Entry Back |
Share on:

|
|
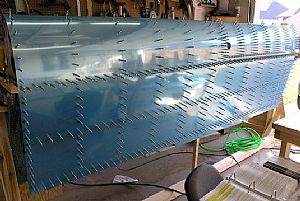 Clecoed the tank on to the wing spar Clecoed the tank on to the wing spar
This is looking good! When I put the tank on the wing spar I immediately noticed that there was a huge gap between the tank skin and large top skin. Time for head scratchin' again.
|
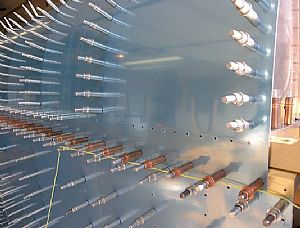 Found part of the problem Found part of the problem
I had to remove some of the 3/32" clecos where the tank skin is clecoed to the tank baffle. They were hitting reinforcement bars on the wing main spar. This closed te gap between the tank and wing top skin considerably. Now for the other end of the tank. The gap on the other end was still there. It was being caused by the splice strip between the leading edge assembly and the tank. For some reason the tank wasn't coming down firmly over the strip. So I started putting in the 1/8" clecos along the bottom of the tanks to try and pull the tank skin down. It worked a little, but not enough.
|
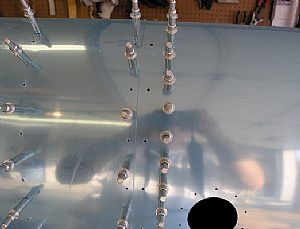
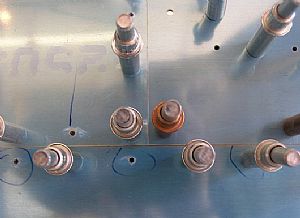 Got the gap closed! Got the gap closed!
This is the weird part. The picture shoes the junction between the leading edge assembly, the tank and the top skin. I had to start at the inboard edge of the tank and started pulling down on the 1/8" clecos (1 in each hand) and worked my way down the line towards the other end of the tank. I made several trips from the inboard end to the outboard end of the tank. This eventually pulled the tank into position, closing the gap. UPDATE 12/14/2006: The gap between the skins really bothered me after clecoing everything together here. The weird part is that when I start riveting everything together, the gaps disappeared completely! The skins actually touch other.
|
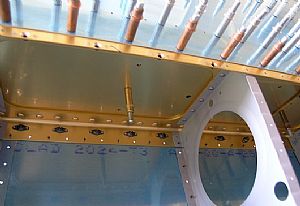 Clecoed the main spar to the tank Z brackets Clecoed the main spar to the tank Z brackets
I just happened to have seven 3/16" clecos that I ordered a long time ago. I put one cleco into each tank bracket and drilled the holes into the brackets using the main spar as a drill guide. I had to buy some really expensive drill bits from Lowes so I could make sure that I wouldn't have to push very hard when drilling these holes. I didn't want the Z tank brackets to get pushed over.
|
 Drilled the last tank bracket holes Drilled the last tank bracket holes
All three of these holes had be to drilled using the wing spar as a drill guide.
|
 Drilled the holes into the W-919 Joint Plate Drilled the holes into the W-919 Joint Plate
Here's where I freaked out and had to call a friend of mine who already knows about this part. The instructions say to "Drill the screw holes in the splice strip". No where in the plans is the W-919 Joint Plate called a "splice strip". I found out from my friend that these holes will eventually become nutplates and screws. I finally found a reference to this on Drawing 9, Section D-D.
|
 Removed the tank to check my work Removed the tank to check my work
Looks pretty good! Also, I need mention here that I also checked for wing twist before removing the tank. I put a plumb-bob on each end of the wing to check it out. I'm happy to report that it is RIGHT ON THE MONEY! I did take a picture of this, but the camera decided to focus on a roach on the floor and not the plumb-bob.
|
Home Previous Entry Next Entry Back
|


