RV-9A: Fuselage Plumbing - 1/29/2010
Home Previous Entry Next Entry Back |
Share on:

|
|
 Started on the Fuel Vent Lines Started on the Fuel Vent Lines
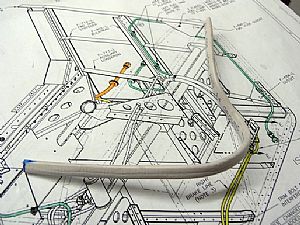
I didn't have a lot of time work this afternoon, so I decided to start work on the vent lines. After installing the elbow fitting on the fuselage, I decided that rather than wrestling with a hunk of pipe and possibly weakening it by repeated bends and adjustments, I grabbed a hunk of Romex (house wiring) and and formed it to a shape that perfectly fits the tubing location. Then all I had to do was form the tubing in the shape of the Romex.
|
 It worked! It worked!
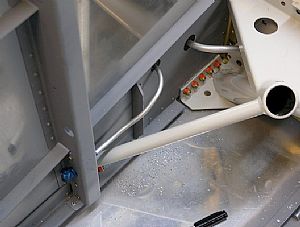
Nice fit. I only had to do a new small adjustments to get the tubing to fit perfectly.
|
 Here's the outside Here's the outside
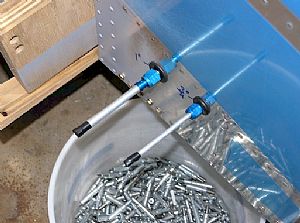
Having these tubes sticking out is a little spooky, especially with the traffic in the garage. One accidental bend and I'm screwed. So I put the wood blocks back into the main wing spar with some smaller chunks of wood under that stick out about 8 inches. I also put my heavy bucket of clecos under the tubing. So now if some gets close to the tubing they will bump into the wood chunks and the cleco bucket instead. I put a 5 gallon bucket of paint on the other side of the fuselage. These tubes are sticking out between 4 1/2 and 5 Inches, which should be enough to connect to the wing tanks. If I'm wrong about this, someone please email me.
|
Home Previous Entry Next Entry Back
|


