RV-9A: Left Wing Skins - 9/29/2006
Home Previous Entry Next Entry Back |
Share on:

|
|
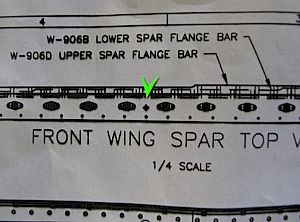 Mystery rivet solved! Mystery rivet solved!
A fellow RV builder emailed me and gave me the solution. Apparently the "plus" sign shown on the drawing indicates a AN426AD3-4 rivet, which is a flat head rivet, which will require me to countersink the spar to put in the rivet.
|
 Found the rivet size on the Rivet Legend Found the rivet size on the Rivet Legend
It�s not Van�s fault that I didn't read the plans like I was supposed to. But the quality of the print on the plans is not very good. As shown in the picture, the symbol for the #4 rivet is hard to tell from the #4.5 rivet.
|
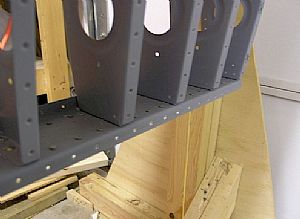
 Removed the outboard leading edge assembly Removed the outboard leading edge assembly
This is reminiscent of the fuel tank.
|
 Final drilled the Mystery rivet hole into the rib Final drilled the Mystery rivet hole into the rib
I put clecos in each of the bottom holes to hold the rib in place for the final drilling of the Mystery rivet hole. Then I used my 12 inch #40 drill bit to drill the holes. After I countersinked this holes, I shot some primer in them and went ahead and put in the flush rivet to hold the top of the rib to the spar.
|
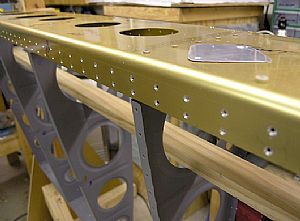 Countersinked all of the #40 rivet holes in the wing spar Countersinked all of the #40 rivet holes in the wing spar
After a few whacks with the Microstop Countersink in the air drill, I managed to get the depth of the countersink just right. Then I went to town, countersinkin� them rivet holes, occasionally checking the depth with my scrap piece of dimpled sheet metal. By the time I got close to the end of that multitude of rivet holes, I started to smell something that indicated to me that something is getting hot. I walked over to the my Sears P.O.S. air compressor and felt the radiant heat off the motor and decided "Maybe it needs a break". After letting it cool off I finished the rest of the countersinks. My next compressor will have the air pump driven by a belt from a separate motor and have a 60 gallon tank.
|
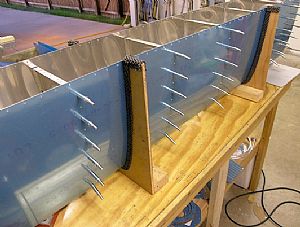
 Dimpled the rear spar Dimpled the rear spar
I used my hand squeezer to dimple these holes. Then, as indicated by the instructions, I did little hand countersink of the holes to make sure that the skin will lay flat on the spar after it is riveting on. To make things a little easier, I duct taped my countersink bit into the end of one of the Home Depot cheapy 6 dollar electric screw drivers, powered by 4 double "A" batteries.
|
Home Previous Entry Next Entry Back
|


