RV-9A: Left Elevator - 1/16/2006
Home Previous Entry Next Entry Back |
Share on:

|
|
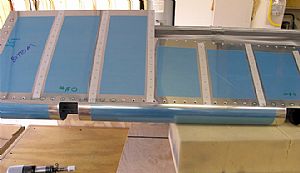 Getting ready to backrivet the stiffeners on the left elevator bottom Getting ready to backrivet the stiffeners on the left elevator bottom
After taping the top of the elevator skin to the backboard, I put a couple of foam rubber mattresses under the skin to hold it up while I taped down the rivets.
|
 Backriveted the bottom left elevator stiffeners Backriveted the bottom left elevator stiffeners
Just as before, this went pretty fast, once I had the timing down.
|
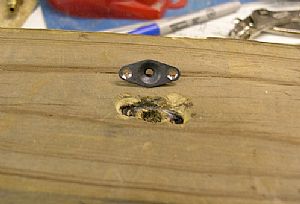 Preparing the nutplates for riveting to the trim tab plate Preparing the nutplates for riveting to the trim tab plate
I got this idea from another builders website. I used a combination of my drill and my drimmel to make hole in a piece of wood to hold the nutplates while I countersinked the nutplate with my drill press. I am starting to notice that the plans don't "hold your hand" anymore. When they say to use a flat head rivet, your supposed to know to either countersink or dimple the hole.
UPDATE: 6/8/2007: This isn't the best way to dimple the nutplates. Check out this page.
|
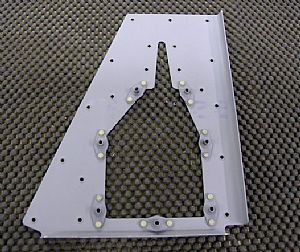 Riveted the nutplates to the trim tab plate Riveted the nutplates to the trim tab plate
After priming the nutplates, I riveted them to the trim tab plate with my hand squeezer.
|
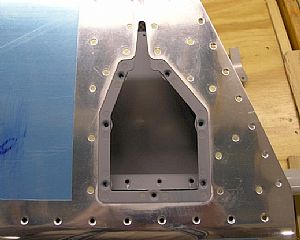 Riveted the trim tab plate to the left elevator Riveted the trim tab plate to the left elevator
I used my 4 inch and "no-hole" yoke to rivet the plate in.
|
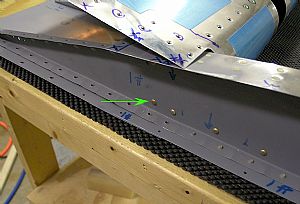 Riveted the counterbalance assembly to the left elevator Riveted the counterbalance assembly to the left elevator
There are 4 rivets to put in to attached this assembly to the elevator spar. The green arrow is pointing to the outer 2 rivets that were real easy to put in. But there was a whole lot of head scratchin' going on, trying to figure the best way to get the inner 2 rivets in. I finally decided to use a long shank rivet set that I got from Averys, along with a bucking bar.
|
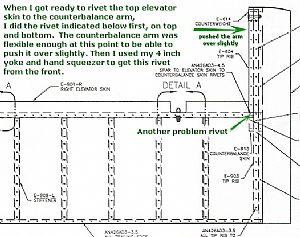 Getting the problem rivet Getting the problem rivet
When I got ready to rivet the elevator skin to the counterbalance arm, I did the problem rivet first, which is shown in the photo (click the picture for a blownup view - yeah I know, it's a picture of the right elevator). At this point, since the counterbalance arm is only riveted to the spar, I was able to push the front of the counterbalance over slightly away from the main spar, pivoting it on the attachment point. Then I was able to get my 4 inch yoke with the hand squeezer in between the counterbalance arm and the rounded front edge of the elevator skin to get to this rivet. After I got both rivets in on top and bottom, then I swung the arm back into position and did the rest of the skin rivets.
|
Home Previous Entry Next Entry Back
|


