RV-9A: Right Elevator - 12/26/2005
Home Previous Entry Next Entry Back |
Share on:

|
|
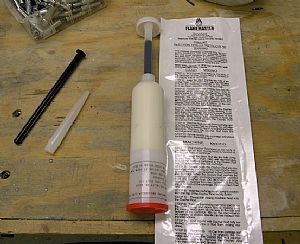 Time for Proseal! (yuck) Time for Proseal! (yuck)
I ordered the Proseal tube from Vans. It comes with a black push rod for pushing the black stuff info the white stuff for mixing and a clear screw-in nozzle for dispensing. The instructions have NO PICTURES, Dammit!. They have weird names for the black push rod and the white mixer rod that has the big round head on it. The white mixer rod comes already stuck in the big tube. It is used to navigate the black stuff evenly through the white stuff, while pushing the black stuff into the white stuff using the black rod. Confused? I was. I'll explain below.
|
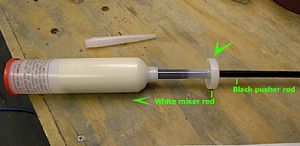 Preparing to push the black stuff into the white stuff Preparing to push the black stuff into the white stuff
The first thing I did was push the white mixer rod with the big round head down into the tube (as for as it would go - about 1/4 inch). Then I inserted the black pusher rod into the hole in the white mixer rod.
|
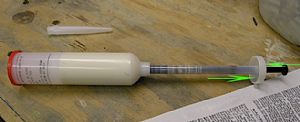 Pushing the black stuff into the white stuff Pushing the black stuff into the white stuff
Then I started pulling the white mixing rod (with the big round head) out away from the main tube while pushing the black stuff into the white stuff with the black push rod, trying to evenly distribute the black stuff throught-out the white stuff, until the white mixing rod was all the way out and the black push rod was all the way in.
|
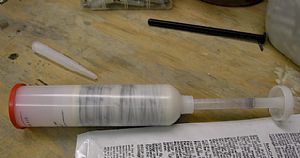 Time to mix the goo! Time to mix the goo!
The instructions said to mix the black and white stuff together by moving the white mixing rod in and out of the main tube, while turning it clockwise. This took quite a while. I kept keep doing it until the outside of the main tube turned almost totaly gray. I never could get rid of all of the white. It still had a few white streak showing through the tube.
|
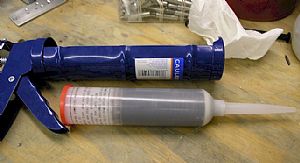 And Voila! Zee Black Snot is ready! And Voila! Zee Black Snot is ready!
I turned the white mixing rod counter-clockwise and unscrewed it from the tube. Then I screwed in the clear nozzle. I removed the red cap from the opposite end of the main tube and put the tube into a Home Depot caulk gun. It seemed a little small for the caulk gun, but I knew it work. UPDATE: 2/19/2006 I found when working on the left elevator trailing edge that I didn't have the blue caulk handy, so grabbed another that I had laying around the shop. The push plunger wouldn't go into the end of the tube. I went to lowes and got another one that had a smaller pusher. This one worked but it was really tight inside the proseal tube. I suggest that if you use a caulk gun like I did, get one where you can rotate the push rod inside the gun. Then you can file down the pusher disk on the end to fit inside the proseal tube.
|
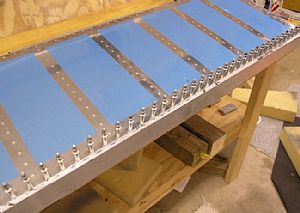 Applied the Proseal to the trailing edge of the Right Elevator Applied the Proseal to the trailing edge of the Right Elevator
The first thing I did was to put a small chewing gum size wad of proseal between the ends of the stiffeners where the come together at the aft end of the elevator. This will keep the stiffeners and skin from moving up and down and cracking the skin. I saw an RV-9A a couple of weeks ago where the skin had cracked between the stiffeners and the trailing edge. The owner had to drill small holes in the skin to shoot proseal in, to stop further cracking. Then I put a 3/8 inch dowel rod into the opening to hold the skin apart so I could apply the proseal to the bottom skin. Then I put a layer of proseal on the top of the aluminum wedge and put it in place. Then I slid the 3/8 inch dowel out, allowing the skin to close in around the aluminum wedge. Then it was just a matter of clecoing everything down to the large aluminum angle.
|
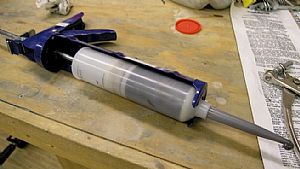 Didn't use as much as I thought Didn't use as much as I thought
The weird part is that I was worried I wasn't going to have enough while I was squeezing this stuff out between the stiffeners and the trailing edge wedge. Look's like there's plenty left over. Oh, by the way, the cheapo caulk gun worked perfectly!!
|
Home Previous Entry Next Entry Back
|