RV-9A: Right Fuel Tank - 1/25/2007
Home Previous Entry Next Entry Back |
Share on:

|
|
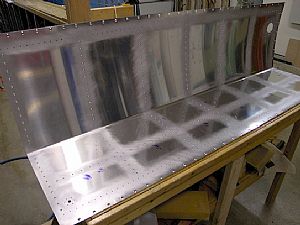 Roughed up the tank skin Roughed up the tank skin
I used a Scotchbrite pad to rough up the inside of the tank skin wherever the skin comes together with a rib or stiffener. I rubbed it down in three different directions to make sure it was sufficiently roughed up.
|
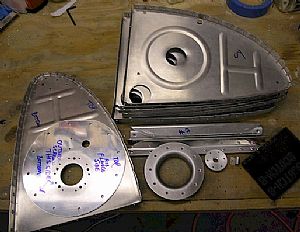 Roughed up the ribs and stiffeners Roughed up the ribs and stiffeners
My son and I put on a movie in the garage and started roughing these dudes up. Then we cleaned everything up with laquer thinner.
|
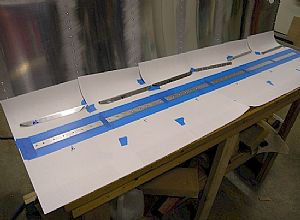 Getting ready for riveting the stiffeners Getting ready for riveting the stiffeners
One lesson I learned from the left tank was that the proseal gets on everything, no matter how hard you try to prevent it. The other thing is that the blue painters tape is a little hard to remove and gets proseal on the tank skin when you try to peal it off after the part is riveted in place. This time I put typing paper down and only allowed about 1/4 of an inch of the tape to actually stick to the tank skin.
|
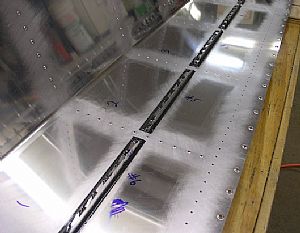 Stiffeners are riveted on! Stiffeners are riveted on!
I mixed up 40 cc's of proseal for this session, which just happened to be just the right amount. After riveting down the stiffeners, it was really easy to peal off the whole paper/tape combination. It really made for nice edges around the stiffeners.
|
Home Previous Entry Next Entry Back
|


