RV-9A: Left Wing Prep - 4/22/2006
Home Previous Entry Next Entry Back |
Share on:

|
|
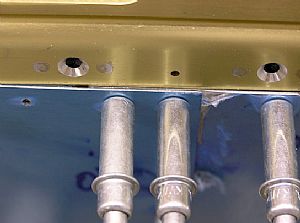 Beveled the wing skins where they overlap Beveled the wing skins where they overlap
I took quite a while, using my file, to bevel the edges of the skins to where they lay flat. According to the instructions, when the tank is attached to the wing, these skins should not stick out above the tank skins. I'm still not happy with the outcome. I plan to hack on it some more at a later date.
|
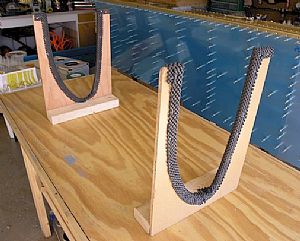 Made the cradle to hold the tank and leading edge skins Made the cradle to hold the tank and leading edge skins
Actually I grabbed my old cradles from the horizontal stabilizer and used one of the front ribs as a pattern to make these new cradles. Then I took some of that rubber mat stuff from Home Depot and lined the edges.
|
 Starting working on clecoing the ribs to the leading edge skin Starting working on clecoing the ribs to the leading edge skin
The plans say to put the leading edge skin in the cradle and start clecoing. No matter what I did, I couldn't get the clecoes in both sides. So I pulled the skin out of the cradle and put one cleco in on the front hole on one side. UPDATE 4/29/2006: For an easier way to do this, check out my tank skin page.
|
 The experiment continues The experiment continues
Then I started putting clecos in on the other side. The first cleco on this side went in the third hole from the back edge of the skin. Before I put this cleco in, I made sure that the holes lined up because once that one cleco was in, I couldn't move the rib around. This technique seemed to work OK, so I put in all the ribs this way, with only one cleco attached on one side and all the clecos attached on the other side.
|
 Finished putting in all the clecos Finished putting in all the clecos
Then I put the skin back into the cradle and put in the rest of the clecos on the side that only had the first hole already clecoed. I started at the front and worked my way back. I'm not sure that I would recommend this method to other builders, but it seemed to work for me. One thing though, I noticed that the ribs fit so tightly against the skin, that they actually push small dents into the exterior of the skin. Oh well, that's what paint is for. UPDATE 8/82005: Turns out the dents aren't really dents. Now that I'm working on the left fuel tank, I noticed after dimpling everything and riveting the ribs in place, I don't see the dents in the skin anymore, where the ribs push on the interior of the skin. Dimpling must relax the fit a bit.
|
Home Previous Entry Next Entry Back
|


