RV-9A: Right Fuel Tank - 1/16/2007
Home Previous Entry Next Entry Back |
Share on:

|
|
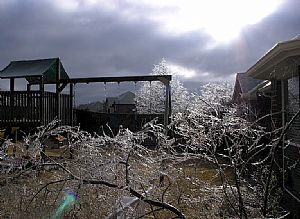 Git the heater out, Ma! Git the heater out, Ma!
BRRRRRRRR! We got hit by a huge rain storm over the weekend. The temperature at ground level was 27 degrees while the temperature at 3,000 feet was 58. "Raindrops are falling on ma haid, then turnin' to ice!".
|
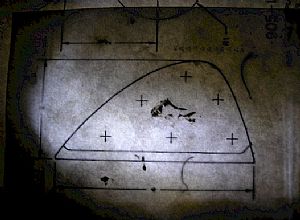
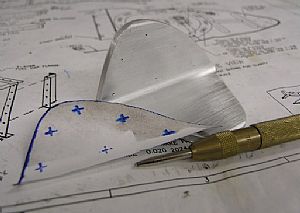
 Time to cut out the T-905 tank attach angle Time to cut out the T-905 tank attach angle
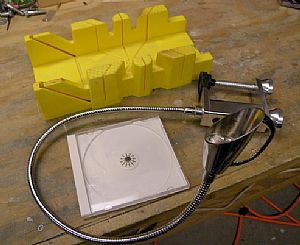
I needed to transfer the drawing of the attach angle from the plans to a sheet of typing paper to make a template. What I needed was a light box, BUT since I'm cheap I decided to create one, "Bubba" style. I got an empty CD case (clear on side), an old miter box and my new LED goose neck light.
|
 Making the light box Making the light box
I took the clear top off the CD case and taped it to the top of the miter box. Then I shoved the LED light under the CD cover.
|
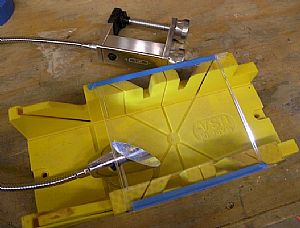
 Let's see if it works Let's see if it works
Yep, shor' nuff'. I used some of my Scotch "Magic" tape to hold the small piece of typing paper on top of the plans, while the plans laid on top of the CD case top. Time for tracin'.
PS: Please excuse the black stuff, it's proseal from the previous tank adventure.
|
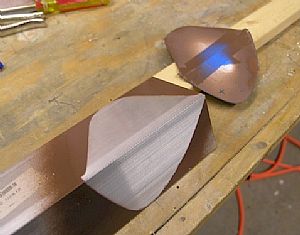 Herr ductorr, time for Z experiment! Herr ductorr, time for Z experiment!
I had the bright idea (arr-arr) to try putting the outline of the paper template onto the aluminum angle by spraying it with some rattle can paint. When the paint dried, it looked great and made a nice outline of the template on the aluminum angle. BUT (there's always a big butt), when I cut the angle out with the band saw and tried to smooth it with the table top sander, the metal got so hot that the paint melted off! D'oh!! Next time I'll just trace the template onto the angle like a good boy.
|
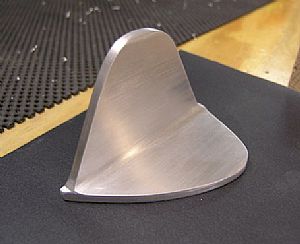 Turned out pretty nice after all Turned out pretty nice after all
This was a long and tedious effort. I was so proud of it that I ran into the house and showed it to my wife. "Look what I did!!", Then she said "Ooooooooooo Kaaaaaaaaayyyyy............". Then she gave that look, you know.... that look. I decided to go back out to the garage where it was safe.
|
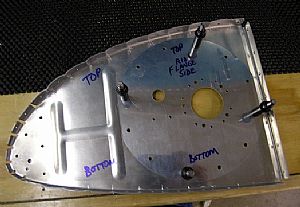
 Started working on the T-410 reinforcement plates Started working on the T-410 reinforcement plates
I only used the drawing template on the plans as a rough go-by. I found out that if you cut these plates exactly the same size as the plan drawing, they'll be too small. I had to order some more plates when I was working on the left tank. Here, I checking the final fit on the outboard end of the tank. Then I used this plate as a template for the other side of the tank, making sure to allow a little extra room for final fitting.
|
 Marked the drilling spots on the attach angle Marked the drilling spots on the attach angle
I laid the paper template on the angle and used my spring loaded punch to make marks on the angle where the #30 holes go.
|
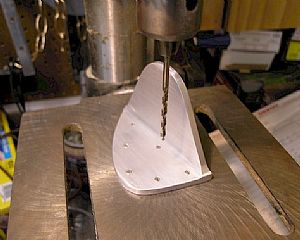 Drill the holes on the attach angle Drill the holes on the attach angle
The drill press was a handy tool for this.
|
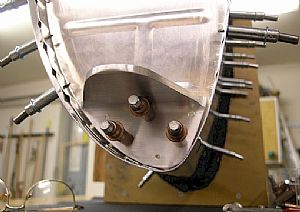 Final drilled the holes in the inboard rib Final drilled the holes in the inboard rib
I lined up the attach angle according to the drawing and used the pre-drilled holes in the attach angle to drill the holes in the inboard rib.
|
 Final drilled one of the T-410 reinforcement plates Final drilled one of the T-410 reinforcement plates
I removed the attach angle and used the freshly drilled holes in the inboard rib to drill the holes in the reinforcement plate.
|
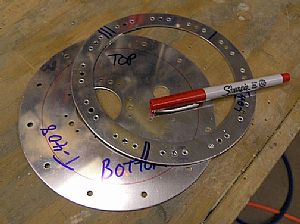
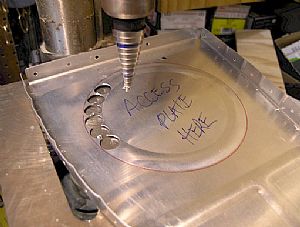 Time to cut out the center hole in the inboard rib Time to cut out the center hole in the inboard rib
I used the T-407 ring as a pattern to draw a circle on the rib with a red sharpie. The instructions say to use a fly cutter for this large hole. My fly cutter needs a new blade, so I decided to use my Unibit in my drill press to start the holes around the outer edge of the hole.
|
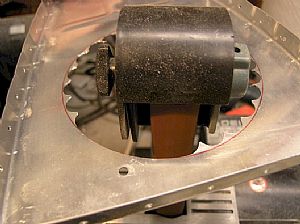 Smoothed off the inside edges of the cutout Smoothed off the inside edges of the cutout
After making a complete circle of holes, I popped the center out and finished off the edge of the hole with my bench sander that has a narrow circular sandpaper belt.
|
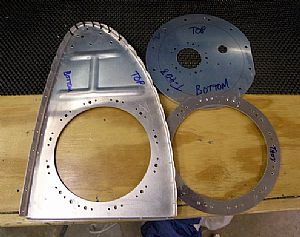
 Getting ready to drill platenut screw holes in the rib Getting ready to drill platenut screw holes in the rib
The instructions say to use the T-408 cover plate to drill the screw holes into the rib, making sure the flat end of the plate cover aligns with the stiffener bead. I assume that they mean the vertical indention in the front part of the rib. To help with the alignment I put the T-407 reinforcement ring on top of the T-408 cover plate and drew a sharpie line on the cover plate. This should help line things up better for drilling the screw holes.
|
 Drilled the platenute screw holes into the rib Drilled the platenute screw holes into the rib
I lined up the straight end of the outer circle of the acces plate with the vertical indention of the rib and then while holding that position, flipped the whole thing over and lined up the access plate with the large hole I cut previously, using the sharpie lines as a guide. After flippin' and adjustin' several times, I drilled my first hole and put a cleco in the hole. Then it was just a matter of drilling the other holes, making sure I stayed on my sharpie line on the access plate.
|
 Thar tis'! Thar tis'!
Signed, sealed and drilled! Now it's time to do some countersinkin' on the large reinforcement ring.
|
Home Previous Entry Next Entry Back
|


